Bootstrap Checkbox Field
Introduction
In some cases the easiest features might actually get very critical-- especially in case you come to need them. For example exactly how do your visitors connect with the pages you set up claiming a simple Boolean act-- just yes or no concerning some of the questions you require to ask, the way they do agree to the conditions and terms or line up a few of the feasible choices they might possess. We typically surpass this with no paying very much of an recognition to the element liable for such actions still, the Bootstrap Checkbox Label is really a quite significant component-- one our forms cannot really perform without.
Inside current fourth edition of the Bootstrap platform we are delivered with the
.form-check.form-check-label<div>.form-check.form-check-label<label><input>.form-check-inputSteps to work with the Bootstrap checkbox:
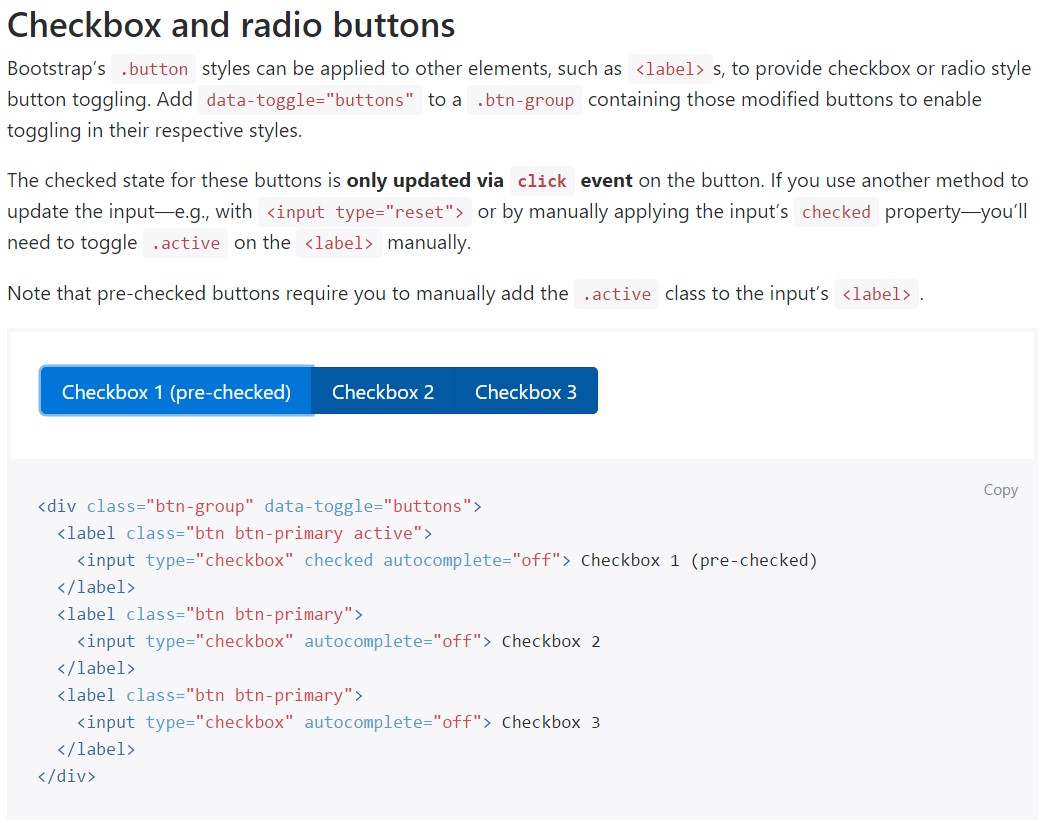
Bootstrap's
.button<label>data-toggle=" buttons".btn-group
<div class="btn-group" data-toggle="buttons">
  <label class="btn btn-primary active">
    <input type="checkbox" checked autocomplete="off"> Checkbox 1 (pre-checked)
  </label>
  <label class="btn btn-primary">
    <input type="checkbox" autocomplete="off"> Checkbox 2
  </label>
  <label class="btn btn-primary">
    <input type="checkbox" autocomplete="off"> Checkbox 3
  </label>
</div>
In certain cases we need to have the checkboxes to come inside our forms without the user truly can get any activity clicking them-- that is actually where exactly the disabled option comes in.
Just to disable appropriately a checkbox in Bootstrap 4 utilizing the typical HTML attribute
disabledIf you really like the tip and really desire to carry this out you need to appoint the
.disabled.form-checkYet another representation
When using checkboxes, wrap them in a
<label>.custom-control.custom-checkboxApply
.custom-control-input<input>As well apply two
<span>.custom-control-indicator.custom-control-description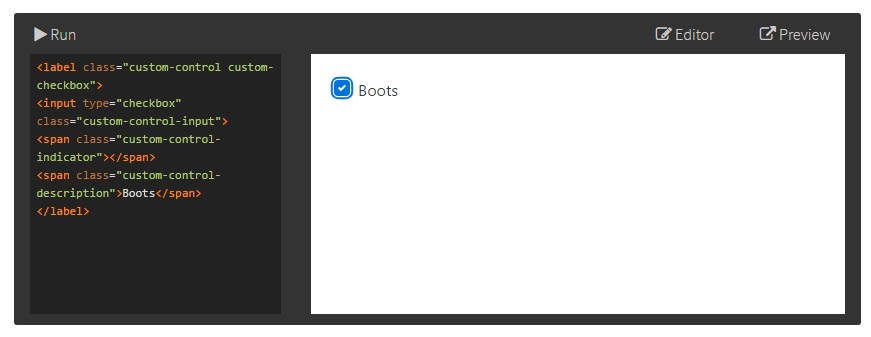
<label class="custom-control custom-checkbox">
<input type="checkbox" class="custom-control-input">
<span class="custom-control-indicator"></span>
<span class="custom-control-description">Boots</span>
</label>
Bootstrap Checkbox Position forms
Default checkboxes and radios are raised upon with the help of
.form-checkThe disabled class will at the same time lighten the message color to help specify the input's state.
A new component for the Bootstrap version 4 framework is the integrating of the so called custom-made form features. These are the very same features we are used to within practicality however designated even more interesting and also with the Bootstrap means. By having them you can bring in special taste as well as style to your material through simply just appointing a couple of supplemental classes to the controls you incorporate in your forms.
If you want to operate customized checkboxes wrap them inside a
<label>.custom-control.custom-checkbox<input>.custom-control-input<span>.custom-control-indicator.custom-control-descriptionConclusions
That's literally all that you must work on in order to place a checkbox element in your Bootstrap 4 powered web pages and bring in certain custom flavor to it adding in it a stylish appearances. Right now all you require to do is repeat the exercise before you have actually checked all of the checkboxes wanted are readily on the web page.
Review some online video tutorials relating to Bootstrap checkbox
Linked topics:
Bootstrap checkbox authoritative information
Centering checkbox buttons in Bootstrap 4 row

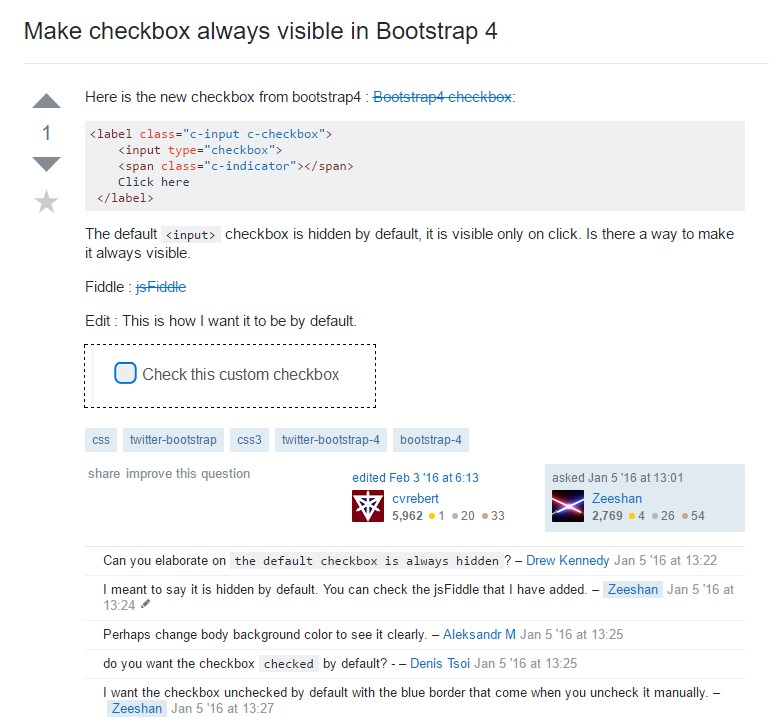
Make checkbox always visible in Bootstrap 4